NORMAL VIDEO
$20.00
-
AUDIO TRACK
-
COLORING
-
MIXING
-
EDITI AND FIX
FAMILY VIDEOS
FOR MORE
" PREES ME"
ANGARIKA DHARMARAPALA ROAD,NATIONAL MUSEUM , KANDY ,SRILANKA,EARTH
0713788263
we are in 24 hours


OUR PLANSFOR WEEK |

8.00AM - 12.00AM OUR FULL VERSIONS " FIRST SHIFT SESSION"OPENS TIME AT THE WEEK |
|
12.30PM LunchCoffee and cookies |

3.30PM TEA TIMECAKES, COOKIES , JELLY , ICE CREAM |

5.00PM REST TIME FOR 2 HOURSSLEEPING , WACTHING TV, WACTHING MOVIES OR MORE. |

12.00AM END THE VERSIONWE ARE COMPLETE THE MISSION SUCESSFULLY. |
OUR PLANSFOR WEEK |

12.00AM - 8.00AM OUR FULL VERSIONS " SECOND SHIFT SESSION"OPENS TIME AT THE WEEK |
|
1.00AM TEA TIMECoffee and cookies |

3.30AM EATING TIMECHICKEN FRIED RICE , KOTTU , PASTA , BURIYANI , CHICKEN LEGS , NOODLES |

6.00AM TEA TIMECAKE , SANDWINCHES , COOKIES, JELLY , ICE CREAM |

8.00AM END OF THE VERSIONWE ARE COMPLETE THE MISSION SUCESSFULY. |
SINCE - 2021
“Victory is always possible for the person who refuses to stop fighting.” – ...
Thinking is the hardest work there is, which is probably the reason so few engage in it. ...
“If you hear a voice within you say 'you cannot paint,' then by all means paint, and that voice will be silenced.” ...
ARTICLE BY
HIMATH PRODUCTIONS

Motivation is something that cannot be understood with words but with practice. It means to be moved by something so strongly that it becomes an inspiration for you.
Furthermore, it is a discipline that helps you to achieve your life goals and also helps to be successful in life.
Besides, it the most common practice that everyone does whether it is your boss in office or a school teacher or a university professor everyone motivates others in a way or other.
Role of Motivation
It is a strong tool that helps to get ahead in life. For being motivated we need a driving tool or goal that keeps us motivated and moves forward. Also, it helps in being progressive both physically and mentally.
Moreover, your goal does not be to big and long term they can be small and empowering. Furthermore, you need the right mindset to be motivated.
Besides, you need to push your self towards your goal no one other than you can push your limit. Also, you should be willing to leave your comfort zone because your true potential is going to revel when you leave your comfort zone.
Although there are various types of motivation according to me there are generally two types of motivation that are self- motivation and motivation by others.
Self-motivation- It refers to the power of someone to stay motivated without the influence of other situations and people. Furthermore, self-motivated people always find a way to reason and strength to complete a task. Also, they do not need other people to encourage them to perform a challenging task.
Motivation by others- This motivation requires help from others as the person is not able to maintain a self-motivated state. In this, a person requires encouragement from others. Also, he needs to listen to motivational speeches, a strong goal and most importantly and inspiration.
Get the huge list of more than 500 Essay Topics and Ideas
Motivation is very important for the overall development of the personality and mind of the people. It also puts a person in action and in a competitive state. Furthermore, it improves efficiency and desire to achieve the goal. It leads to stability and improvement in work.
Above all, it satisfies a person’s needs and to achieve his/her goal. It helps the person to fight his negative attitude. The person also tries to come out of his/her comfort zone so that she/ he can achieve the goal.
To conclude, motivation is one of the key elements that help a person to be successful. A motivated person tries to push his limits and always tries to improve his performance day by day. Also, the person always gives her/his best no matter what the task is. Besides, the person always tries to remain progressive and dedicated to her/his goals.
Q.1 Define what is motivation fit.
A.1 This refers to a psychological phenomenon in which a person assumes or expects something from the job or life but gets different results other than his expectations. In a profession, it is a primary criterion for determining if the person will stay or leave the job.
Q.2 List some best motivators.
A.2 some of the best motivators are:
Inspiration
Fear of failure
Power of Rejection
Passion
Don’t pity your self
Be assertive
Stay among positive and motivated people
Be calm and visionary
ALTANIC RECORDS
B.o.B - Airplanes (feat. Hayley Williams of Paramore) [Official Video]
Success doesn't just find you. ...
THERE IS NO DRONE THAT MEANS THERE IS NOTHING ON IT.
TRALIERS
EFFECTS WE HAVE
TRANSITIONS WE HAVE
AUDIO TRACKS WE HAVE
Finished projects
0713788263
Finished projects
SOFTWARES WE HAVE
EFFECTS
EXPERIENCE
ADDRESS-NO.198,DIGANA VILLAGE,DIGANA,SRILANKA,EARTH
MANAGING DIRECTOR - SANETH ATHUKORALA
PHONE NUMBER - 0716815537
GMAIL - sanethvindula@gmail.com

Article by
Himath Ranhinda

Horror movies often get snubbed when it comes to critical appeal, but there are some actresses who deserve recognition for their work.
BY Himath Ranhinda
PUBLISHED
FEB 23, 2020
On a recent edition of Eli Roth’s History of Horror podcast, Roth and Quentin Tarantino wrapped up their 2-hour conversation by discussing who they would pick as some of the greatest performances in horror film history. The two horror aficionados limited their choices to five and never came up with a definitive list. That’s where we take over.
RELATED:10 Most Underrated Horror Films From The Past 5 Years
Too often dismissed for their subject matter, horror films usually don't come to mind when discussions of great acting performances take place. In reality, horror can produce some terrific work from actors, as a range of emotions often is on display. In part one, we take a look back at some of the greatest acting performances by females in horror films. A tough list to narrow down to just ten, the list is sure to stir a lot of debate about who should have made it and who should have been left off. Hopefully, though, you’ll agree with most of what we have come up with. Here are the 10 Greatest Female Performances In Horror Film History.
In director Ari Aster’s first feature film (and the superior film to his more talked-about follow-up, Midsommar) Hereditary, Toni Collette stars as emotionally wrecked mother Annie Graham. Running the full gamut of emotions, Collette truly delivers on all levels in one of the finest performances of her career. In fact, her incredible performance was more than deserving of earning a Best Actress nomination at the 2019 Academy Awards.
If it weren’t for the Academy’s long-standing bias against horror films (the ones that do get nominated are often rebranded thrillers), Collette may not have only received a nom for her work, but very well may have taken home the Oscar that year.
Although heralded as a masterpiece by master director Stanley Kubrick (which it definitely is), the performances in The Shining played a major part in the film working as well as it did. Jack Nicholson often gets much of the credit for the acting work in the film, but Shelley Duvall’s performance as Wendy Torrance deserves just as much praise, if not more. In fact, Nicholson himself has said that he considers her role to be the most difficult any actress has ever tackled.
And let’s not gloss over the fact that Duvall allegedly endured verbal abuse from the famed director, which led to severe exhaustion and illness. It is often said actors sacrifice for their craft, but no actor should have to go through what Duvall did. Her performance should be celebrated, not overlooked.
Four years before she would win an Academy Award for her work in Coal Miner’s Daughter, Sissy Spacek exploded on the scene in Carrie, the first film to be adapted from a Stephen King book, which also happened to be King’s first novel.
RELATED:10 Stephen King Books That We Need To See Movies Made Of
Directed by Brian De Palma, Spacek’s stunning performance of the abused and tormented high school girl with telekinetic powers was a harbinger of the great work to come from the very talented actress. Spacek said she was able to achieve the performance in part by isolating herself and diving deep into religious study.
What more can be said about the iconic Halloween and the role of Laurie Strode, made famous by Jamie Lee Curtis? The film, which launched the career of legendary director John Carpenter, was responsible for the explosion of the slasher genre, which itself would thrive well into the nineties. Although it was Carpenter’s directing, musical score, and writing (along with co-writer Debra Hill) in tandem with some incredible work by cinematographer Dean Cundey that gave the film the perfect atmosphere and tone, much of the film hinged on Curtis’ performance, which by the way was her first in a feature film.
Her vulnerability, and then strength, as teen bookworm Strode gave the audience a sympathetic character to root for against the evil, seemingly invincible Michael Myers. The role was so powerful and iconic, it has endured for over forty years, with Curtis returning to the franchise for a sixth time this year in Halloween Kills.
Now celebrated for its strong female heroine, the part of Ripley in Alien was not originally intended to be female (although the part was written as unisex, so it could be cast as either male or female). However, director Ridley Scott wisely chose to switch the character to female during the film’s development. Although technically still a “final girl,” Sigourney Weaver’s character is a strong, intelligent female from the start and is more akin to a male hero character, a la Captain Kirk or Han Solo.
Groundbreaking for the time, the film, along with Weaver’s portrayal of Ripley, opened the doors for more powerful female characters down the road, such as Sarah Connor, Arya Stark, Captain Marvel, and Buffy Summers. Ridley’s work in Alien would garner her an Academy Award nomination in 1980 and cemented the film as an American cinematic masterpiece.
Maybe the greatest performance ever by an actress in a horror film, Kathy Bates thoroughly dominated the screen with her performance in Misery, picking up an Oscar for Best Actress in 1991 as a result.
RELATED:10 Best Sci-Fi Horror Movies That Blend The Genres Perfectly
Although a successful working actress in film and television before she landed the part of Annie Wilkes in Rob Reiner’s Stephen King adaptation, Bates’ work in Misery placed her on a different level, leading to major parts in Fried Green Tomatoes, Titanic, and About Schmidt. It even impressed King so much, he wrote the character of Dolores Claiborne with Bates in mind and changed the part of Ray Flowers in his The Stand screenplay adaptation from male to female when Bates expressed interest in the part.
Considered by many to be the greatest, or at least scariest, horror movies of all-time, The Exorcist was released to much controversy on December 26, 1973. Based on William Peter Blatty’s novel, the film created quite a hysteria among Catholics and non-Catholics alike, with reports of people becoming physically ill or traumatized by the film and protests following the film across the country.
The movie’s success was largely dependent on finding a young girl who could pull off the very challenging role of Regan, a task that turned many filmmakers away from taking on the film. Director William Friedkin rejected many known young actresses before discovering little-known twelve-year-old actress Linda Blair. Blair proved more than up to the challenge, giving the film the emotional heft it needed to work.
A true cinematic masterpiece, Rosemary’s Baby is perhaps now best known as the movie that preceded the horrific Manson family murders in 1969, with one of the victims being Rosemary director Roman Polanski's wife, Sharon Tate. It also may be tainted, depending on if you can separate an artist’s personal life from their work, by Polanski’s statutory rape conviction and subsequent fleeing from the US. The film’s star, Mia Farrow, is no stranger to scandal herself, as evidenced by her messy divorce from filmmaker Woody Allen.
Putting all of that aside, however, Farrow’s work in Rosemary’s Baby is truly excellent, portraying Rosemary Woodhouse, a pregnant young woman recently relocated to a New York City apartment building with her husband, who suspects a cult is trying to take her unborn baby from her. Farrow won and was nominated for multiple awards for her performance.
In this 2014 Australian horror film, Essie Davis plays Amelia Vanek, a frazzled, widowed mother to six-year-old Sam, a hyperactive, difficult child. Exhausted and at her wit’s end with Sam, the situation gets worse when a malevolent spirit, the Babadook, begins tormenting the family.
RELATED:10 Horror Books Too Twisted To Be Made Into Films
On the verge of a complete mental breakdown, as a result, Amelia is eventually possessed by the Babadook, leading to the film’s thrilling conclusion. Davis is outstanding in the role, truly capturing the portrayal of a mother on the edge of sanity, drowning in resentment, and being consumed by rage. Her performance is critical in making the film work as well as it does, and she excels on all fronts.
Released in 1974 to mostly positive reviews, Tobe Hooper’s cinematic masterpiece, The Texas Chainsaw Massacre, has inspired and influenced an immeasurable number of filmmakers over the past 46 years. Its influence can be seen in films such as Evil Dead and The Blair Witch Project, as well as laying the template with silent killer Leatherface for movie monsters Jason Voorhees, Michael Myers, and countless others.
The performance by final girl Marilyn Burns as Sally Hardesty is nothing short of phenomenal, particularly in the film’s third act when Hardesty is tortured and tormented by the cannibalistic clan of creeps. Burns is so convincing in her work as the mentally broken Sally that the audience can’t help but be left shaken and deeply disturbed by the time the end credits roll.
ARTICLE BY
HIMATH RANHINDA

The awakened crew are shaken, demoralized and still far from their destination, so when they hear a distress signal coming from a nearby planet that seems habitable, they decide to take a leap of faith and head there rather than go back into hypersleep and risk death again. And they all live happily ever after in a land of rainbows and unicorns. Just kidding! They end up trapped on a rainy planet filled with creatures that want to eat or impregnate them.
They’re momentarily rescued by David (Fassbender again), who settled there after the bloody climax of the first film and now has long hair, a Jedi robe with hood, a sullen and a grandiose demeanor, and lives in a spectacular ruin of an ancient city that was originally colonized by the Engineers from “Prometheus.” Daniels, who is determined to realize her late husband’s dream of building a cabin by the edge of a lake, went along with Oram’s plan to detour to this new world, but now feels trapped and hopeless. So do the other colonists, some of whom have ingested spores that will gestate into xenomorphs.
If this sounds a bit like a variation on the plot of every “Alien” film ever, that’s because it is. The series’ repetitive structure is a feature, not a bug, as in the James Bond, "Star Wars" and Marvel franchises. If you don’t like them, you can complain that they recycle the same images and situations. But if you like them, you can compare them to sonatas or sonnets or three-chord pop songs, where part of the fun lies in seeing what variations the artists can bring while satisfying a rigid structure. The ritualized beats of the “Alien” movies offer many such scenarios, including initial landing on the dark planet, the first alien attack, the realization that a character that you thought was part of the team is actually treacherous, the escape from the complex that’s about to be wiped out, and the second ending that happens when you thought the story was over.
This one has a lot of nifty variations, most revolving around Fassbender’s dual performance. The film starts with a flashback prologue showing the android David in conversation with his creator, technology magnate Peter Weyland (Guy Pearce, who acted the role in old age makeup in “Prometheus”). Alert viewers will realize that the movie wouldn’t start with a flashback to David’s creation unless it intended to bring him back in later. His entrance is delayed (perhaps too long, though your mileage will vary), but once he’s in the story, saving the wrecked colonists from an unrelenting, expertly choreographed attack by xenomorphs in a field of tall grass, Fassbender gets numerous chances to act against himself, via digital compositing so subtle that we forget we’re seeing e
And it’s in these scenes, thoughtfully written by John Log Dante Harper and gracefully acted by Fassbender, that we realize that this movie is not merely a bridge between the “Alien” films and “Prometheus,” but between the “Alien” films and “Blade Runner” as well. The David-Walter relationship differentiates “Covenant” from all other “Alien” films. It gives it a beating heart as well as an endless source of humor that’s often dry and occasionally self-aware, verging on campy. The highlight is a marvelous scene, done with a laterally moving camera and no cuts, where David suggestively teaches Walter how to play the flute. It’s charged with hilariously amped-up homoerotic energy, but it’s also a joke on actor narcissism: this is a rare movie where the star gets to seduce himself.
As in all of the “Alien” films, characters do tremendously stupid things with such regularity that you pretty much have to stop judging the movie by real-world logic. Instead you have to judge it by the standards of a fever dream or nightmare, a Freudian-Jungian narrative in which the thing you fear most is what happens to you, and where you’re doing stuff like going to work naked or trying to climb across the face of a skyscraper or accepting someone’s invitation to look into, say, the sticky maw of a xenomorph egg that just opened (the latter actually happens in “Covenant”).
The atmosphere inside David’s city of the dead encourages that sort of viewer engagement. It’s one of the great sets in horror movie history, up there with the refinery vessel in the first film and the infested colony in the second. The medieval look of the place (it seems to have been carved from volcanic rock by laser) drives home that “Covenant” only looks like a hard sci-fi film about technology and rational thought. In its heart it’s more of a dark fairy tale about destruction and creation, death and birth, parents and children (biological and figurative), and sexual violation and monogamous love (many of the crew are married, including a crowd-pleasing couple played by Danny McBride and Amy Seimetz).
The necropolis is where David devises new life forms and tantalizes Walter by insinuating that he’s missing out by failing to evolve, as David has been able to do. He’s a Frankenstein’s monster who has, over time, become a version of Dr. Frankenstein (in effect becoming his own “father,” Weyland). His dubious achievements include delusions of godhood. But there’s ultimately more of Shakepeare’s exiled sorcerer Prospero in the character, as well as echoes of Caliban, the hideous and jealous son who, like David, is obsessed with impregnating the humans he despises so much. (In Shakespeare’s play, Caliban declares, “Thou didst prevent me; I had peopled else/this isle with Calibans.”)
Scott and production designer Chris Seagers and conceptual artist Dane Hallett borrow from H.R. Giger and Ron Cobb’s founding designs as well as the embellishments seen in later films, but there are also echoes of 1930s Universal monster movies ("Bride of Frankenstein" especially), Jean Cocteau’s "Beauty and the Beast," and the work of Guillermo del Toro, whose films are often so filled with drawings, sculptures and ancient texts that they feel like meditations on creativity itself. Aside from being a fascinating character in his own right, David is a stand-in for Scott, who will forever be at once the son of the many cinematic parents who nourished his imagination, anxious to prove himself their equal; and the father who brought a new substratum of science-fiction film into existence almost 40 years ago and then stood by for decades, watching it subsume and devour the genre before returning at last to reclaim it.
I Ioved this movie so much that its flaws—which include a cannon fodder sameness in the minor characters and a failure to develop the religious dimension laid out early in the script, except as it relates to science—barely registered. “Covenant” has its own personality and rhythm, a remarkable achievement on its own considering how many “Alien” films have been made over almost four decades. And it touches on so many of the recurring obsessions in Scott’s long career (he turns 80 next year) that it feels like a summation of everything he’s about. The macho Ridley Scott, the unexpectedly tender Scott, and the maker of Biblical epics, conspiracy thrillers, fables, and unabashed eye candy advertisements, are all represented here.
This is one of Scott’s best-directed movies and one of his most entertaining overall, partly because he’s working in a genre, the science fiction spectacle, that he does better than anyone since Stanley Kubrick, but also because he seems to be approaching it almost entirely in terms of visceral impact and emotion—as symphony of fire and blood, poetry and schlock. The best sequences (in particular the spore infestation that brings us inside an ear canal, the first attack in the grass, the flute scene, the flashback revealing the city’s destruction, and the escape from the planet) put nearly everything else being done in science fiction or fantasy at this budget level to shame. It’s rare to see such a combination of technical mastery and wicked joy in a film by a director who’s been working as long as Scott. This is the third best “Alien” movie after the first two, but don’t be surprised if repeat viewings kick it up a notch.
2017
2018
VFX,CGI,GREEN SCREEN,ROTOCOPING,EDITING,LIGHTING,PRODUCING,DIRECTING ARE
OUR BLOOD.

Himath Ranhinda

The technique behind green screen actually dates back to the early 1900s. Blue screen was more popular at first because it worked better with celluloid film. Green screen is more common and practical now with the rise of digital filmmaking. And you, dear filmmaker, can take advantage of its increasing accessibility.
WHAT’S GREEN SCREEN & HOW DOES IT WORK?
Green screen is a visual effects (VFX) technique where two images or video streams are layered—i.e. composited—together. Think about behind-the-scenes clips or bloopers reels from Hollywood movies. It’s hard to miss the sheer amount of green you see on set.
Green screen basically lets you drop in whatever background images you want behind the actors and/or foreground. It’s used in film production (and also in news and weather reports) to relatively simply place the desired background behind the subject/actor/presenter. When a background isn’t available—like a fictional, alien, historic, futuristic or even just hard-to-access location—green screen comes to the rescue!
After the footage is shot, the compositors take over:
The new background is composited (i.e. two images or video streams are layered together) into the shot.
The chroma key singles out the selected colour (usually the green) and digitally removes it by rendering it transparent. This lets the other image to show through.
When used with more sophisticated 3D techniques, this process can add any new element (smoke, fire, rain, etc.) to complex moving shots.
AN IMPORTANT NOTE: WHY GREEN?
Technically, you can use any colour background. A vibrant, almost neon green is the standard choice because it’s strong and usually a distinctly different colour from anything on the subject (e.g. the actor’s clothes, eyes, hair, accessories).
But green doesn’t work for everything. You wouldn’t be able to film Kermit the Frog against a green screen—he’d disappear! In this case, you’d typically use a blue screen, the “second-in-line” colour.
HOW TO SET UP A GREEN SCREEN SHOOT
No green or reflective surfaces.
Avoid green like the plague. Don’t have the subject wear or hold anything green or else the areas will be transparent once chroma-keyed.
Reflective materials are also a no-no. Shiny objects (e.g. glasses, large jewelry, props, etc.) will pick up the green from the screen and will also be rendered transparent. Very small jewelry is usually okay though.
Have makeup available.
Actors can look pale and sickly against a green background. You might need some makeup adjustments.
Allow depth.
For a full shot of your actor, you’ll need to back up the camera to allow the full figure shot plus a good separation between the subject and the green screen (usually at least 6 feet to avoid “spill”).
Depending on the lens, you’ll typically want 25-30 feet depth for a full-length shot that doesn’t shoot off the edges of the background.
Use a “coved” green screen for best results.
To show your actor/subject from head to toe, the green screen has to continue down the wall and onto the floor under their feet.
A cove (a curved corner where the wall meets the floor) will smooth out the transition from wall to floor. You want to avoid shadows and hard lines that cause gradient changes in the green background.
Light evenly and softly.
Light the green screen as smoothly as possible to give an even texture and gradient. The more even the lighting, the better and easier it’ll be to manipulate the material.
Keep the green screen itself as clean and smooth as possible to maintain a consistent colour range. If the screen is fabric, make sure there aren’t any wrinkles. If painted, keep extra paint on hand to touch up any scuffs and scratches.
Light separately.
The green background should be lit separately from the subject to avoid: a) the subject casting shadows on the background (causing uneven gradient) and b) a green hue bouncing off the subject, which will cause problems when removing the background.
This is also why you’ll want at least six feet separation between background and subject.
Keep the camera still.
For simple green screen shots, keep the camera completely static. Lock down the camera so the subject doesn’t look like it’s vibrating or bouncing against the background when the camera moves even slightly.
Zooms also look strange. Your subject will look like it’s shrinking or growing in relation to the background.
You can use motion control and motion trackers for more sophisticated 3D shots, but it’s a lot more work for the VFX team.
Use Chroma Key software that works for you.
Research and consider software based on the shots needed, the editing system, budget, and user experience. Your options for Chroma Key software will essentially depend on the type of shot.
There’s free, user-friendly software for simpler shots, but they probably won’t be able to pull off the more sophisticated effects you see in feature films.
HIMATH RANHINDA

USING GREATEST EFFECTS IN THE EARTH

HIMATH RANHINDA

ANGARIKA DHARMARAPALA ROAD,NATIONAL MUSEUM , KANDY ,SRILANKA,EARTH
0713788263
we are in 24 hours
Himath Ranhinda

CyberLink PowerDirector 365. Best video editing software for Windows (and Mac) users. ...
Corel VideoStudio Ultimate. ...
Apple iMovie. ...
HitFilm Express. ...
Final Cut Pro X. ...
Pinnacle Studio. ...
Filmora9.
HIMATH RANHINDA

HIMATH RANHINDA

Have you ever wondered how to make your films look like the pros? You might feel inclined to blame your camera, your lenses, your budget, but that would be the wrong response. All of the great cinematographers study the characteristics of light. Learning how to control the fundamentals of lighting will allow you to shape light that creates images worthy of the big screen. Although we will be discussing cinematography lighting, all of these principles apply to photography lighting as well. As this series of articles on lighting techniques progress, we will go into greater detail about each of the four principles of film lighting: quantity, direction, quality, and color. With these fundamentals of lighting under your command, you will understand how to create cinematic lighting.
HIMATH RANHINDA

2 Walt Disney Studios. Disney is pretty much the future of film and overall media. ...
3 20th Century Fox Studios. ...
4 Marvel Studios. ...
5 Universal Studios. ...
6 Paramount Studios. ...
7 Columbia Pictures. ...
8 Sony Pictures Studios.
Article by: Himath Ranhinda

ARTICLE BY:
HIMATH RANHINDA

Himath ranhinda

AHIMATH RANHINDA

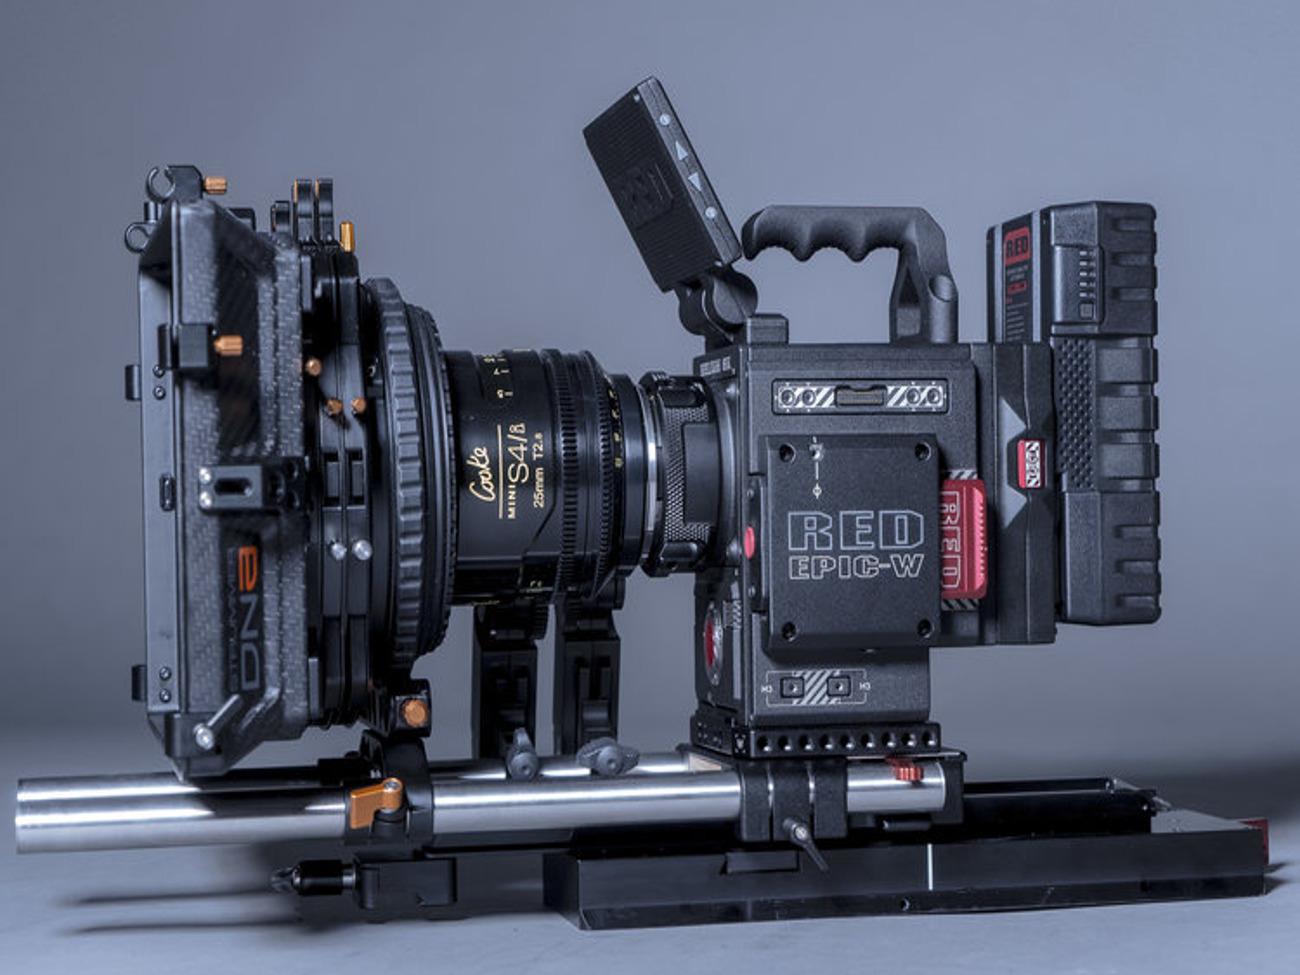
Best 4K DSLR & Mirrorless CamerasPanasonic Lumix DMC-GH4Sony Alpha a6500Fujifilm X-T3Olympus OM-D E-M1 Mark IIPanasonic Lumix DC-GH5Sony Alpha a7 iiiNikon Z6Sony Alpha a7S iiPanasonic Lumix DC-GH5sCanon EOS RSony Alpha a7R iiiNikon Z7
Best 4K Cinema CamerasBlackmagic Pocket Cinema CameraJVC GY-LS300 4KCAMSony PXW-FS5M2
Canon EOS C200BBlackmagic Design URSA Mini ProPanasonic AU-EVA1Canon EOS C200Sony PXW-FS7M2RED RAVEN BRAIN with 4.5K DRAGONCanon Cinema EOS C300 Mark II
1
4K video is an oddly confusing topic, but there are some relatively simple answers that will clear things up. This will not only help you understand 4K cameras, but also working with 4K images.
This article isn’t about file management or storage, but you will make weird mistakes in your NLE if you don’t understand why 4K is… 4K.
4K video refers to video that is recorded with a horizontal (width) display resolution of 4,000 pixels. The exact number varies when used for TV broadcast vs. cinema projection, but the idea is that the horizontal pixel count lands around 4,000.
Digital Cinema Initiatives (DCI) | 4096 × 2160
Ultra High Definition (UHD) | 3840 × 2160
Digital video formats commonly use vertical resolution (e.g. 1080) to describe the specific format rather than using the horizontal resolution like the filmmaking community does with 4K (e.g. 4096).
The resolution axis used to identify 4K (e.g. 4096) is horizontal.
The resolution axis used to identify HD video (e.g. 1080) is vertical.
Before digital video was a viable option for use in cinema, film scanners would use the horizontal resolution measurement.
4K was a film format before it was a digital video format, and thus manufacturers relabeled the new 4K digital video format to fall in line with an existing label used by the film community.
4K could be referred to as 2.1K, but this isn’t the case so… here we are.
Netflix has their own set of 4K requirements for their 4K streaming service, and they have strict specifications for the sensors used to capture footage.
4K UHD RESOLUTION: A camera must have a true 4K UHD sensor (equal to or greater than 3840 photo-sites wide).
RECORDING FORMAT: Minimum of 16-bit Linear or 10-bit Log processing. At least 240 Mbps (at 23.98/24 fps) recording.
The reason we’ve added these specifications is to provide popular standards that exist in the arena of professional entertainment and streaming services.
If you are ever in doubt or want to know how to practice 4K for future professional work, we suggest you start there.
Based on the specifications above, the ARRI Alexa Mini would not be considered a true 4K camera because it does not have a true 4K sensor.
This list is for intermediate to professional filmmakers. For the sake of avoiding budget depression, we’ve set our price range from $100 to $10,000.
For some context, the ARRI Alexa SXT camera body alone costs $74,000.
We have included 4K action cameras, 4K drones, 4K DSLR, 4K mirrorless, and 4K cinema cameras to our list. We listed them in order of price from lowest to highest in each category, but that doesn’t imply any camera superiority.
Also, all stats listed are in the context of 4K video, so while a camera may have impressive capabilities for HD video, it may not line up with the 4K video specs.
Keep that in mind while reading.
Related: The Best Mirrorless Cameras →
Related: Top Video Cameras for Filmmakers →
Related: FREE Directing Masterclass: Filmmaking Techniques →
2
The cheapest 4K camera on this list. Action cameras are useful for stunt work and action shots, but can also be attached to vehicles.
Be careful when securing an action camera to anything that moves at high speed.
Price: $150
Mount: YI Technology
Format Size: 1-Chip
Max FPS: 4K @ 30fps
GoPro is the standard for 4K action cameras for good reason.
The GoPro HERO5 Session is a 4K camera with the lowest price, but that doesn’t mean it doesn’t get great footage. You could get six of these and shoot the best GoPro videos.
The advantage with this GoPro is that it's considerably smaller than most other GoPro's, but there isn't a touchscreen which makes it more difficult to use. Also, since this action camera is the smallest, it also has a smaller battery which means faster battery consumption.
Lastly, it has a slightly less sensor and photo resolution than the GoPro HERO5 (10MP vs. 12MP).
Price: $200
Mount: GoPro
Format Size: 1-Chip
Max FPS: 4K @ 30fps
This specific GoPro will not get you 4K slow-motion video. If you need to shoot at higher frames per second, we suggest looking at the GoPro HERO6.
Price: $235
Mount: GoPro
Format Size: 1-Chip
Max FPS: 4K @ 30fps
Finally, we get to a GoPro that captures 4K at 60fps. This will allow you to have slow-motion video. You could buy three of these for around $1000 and get some crazy footage running at the same time.
Whichever GoPro you choose, it's important to specify the details on your shot list to plan more effectively.
Price: $326
Mount: GoPro
Format Size: 1-Chip
Max FPS: 4K @ 60fps
Pro Tip: If you end up shooting at a higher frame rate camera like a GoPro, note specify it in your shot list creator. Just add all the shots, then click on FPS (Frames Per Second) to add the frame rate of choice.
Unfortunately, Sony’s action camera does not do 4K above 30fps, but it’s nice to see that there are other action camera options beyond the GoPro.
Price: $400
Mount: Sony Action
Format Size: 1-Chip
Max FPS: 4K @ 30fps
The GoPro HERO7 allows you to capture in 60fps which can give you slow-motion video. These are really great for action shots and you can even throw this camera off a cliff while it records - just be careful.
Price: $400
Mount: GoPro
Format Size: 1-Chip
Max FPS: 4K @ 60fps
This drone is super useful for establishing shots or big sweeping footage captured over the countryside. If you’re really clever, you can find some creative ways to film your narrative scenes as well.
Price: $1,430
Mount: Built-In “35mm Equivalent” Lens
Format Size: 1-Inch
Max FPS: 4K @ 60fps
The Dolly Shot: Creative Uses of Camera Movements, Shots, Angles →
The Long Take: Creative Examples of Camera Movements & Angles →
3
This is the first ILC (interchangeable lens camera) we find on our list, and it’s a great little machine. This Panasonic isn't as versatile as its big brothers, but for $1000, you can get some seriously crisp images.
Price: $1000
Mount: Micro Four Thirds (MFT)
Format Size: Micro Four Thirds
Max FPS: 4K @ 30fps
This Sony is such a great camera, and while the 4K capabilities are limited, the camera itself is quite fantastic. If you’re unsure of how much you want to shoot 4K, but you’re sure you want a nice mirrorless camera, grab this.
Price: $1,100
Mount: Sony E-Mount
Format Size: APS-C
Max FPS: 4K @ 30fps
This mirrorless 4K camera is a great tool for every kind of filmmaking, which includes cinematic filmmaking. Fujifilm has a really nice picture profile for skin tones as well. On top of that, you can shoot at higher frame rates to get slow motion footage.
Price: $1,500
Mount: Fujifilm X-Mount
Format Size: APS-C
Max FPS: 4K @ 60fps
This mirrorless cannot do 4K slow motion, and it uses an M43 (micro four thirds) sensor, but neither of these things disqualifies it as a great 4K option.
Watch the video to see just how nice the image quality can be.
Price: $1,700
Mount: Micro Four Thirds
Format Size: Micro Four Thirds
Max FPS: 4K @ 30fps
This mirrorless camera has the best internal stabilization feature so your 4K video will look incredibly smooth out of this machine.
This camera has a low price tag, and is one of the best mirrorless cameras.
Price: $1,700
Mount: Micro Four Thirds
Format Size: Micro Four Thirds
Max FPS: 4K @ 60/fps
This is the king of mirrorless video cameras so the fact that it shoots 4K is just an added bonus. Doesn't do slow-motion 4K which might be the only negative of the best mirrorless video camera on the market.
Price: $2,000
Mount: Sony E-Mount
Format Size: Full-Frame
Max FPS: 4K @ 30fps
Brand new mirrorless that shoots 4K at 10-bit. Doesn’t do slow motion in 4K, but it easily beats out the Canon EOS mirrorless as far as 4K capability. Even better than the big brother Nikon Z7.
Price: $2,146
Mount: Nikon Z-Mount
Format Size: Full-Frame
Max FPS: 4K @ 30fps
This was one of the big punchers in the early days of mirrorless cameras, and it is still used as one of the best low light cameras out there. Limited by its 4K capabilities, but a great camera for any filmmaker.
Price: $2,200
Mount: Sony E-Mount
Format Size: Full-Frame
Max FPS: 4K @ 30fps
You lose some stabilization from the earlier model, but you gain the ability to shoot 4K at 60fps. The Panasonics are the arch-rival to the Sony mirrorless cameras, and some swear by them completely.
Price: $2,300
Mount: Micro Four Thirds
Format Size: Micro Four Thirds
Max FPS: 4K @ 30fps
This camera is Canon’s mirrorless option with some expensive lenses and some new features. The camera allows 4K at 60fps, but there is a 1.8x crop which sort of defeats the purpose. Consider this with the price.
Price: $2,300
Mount: Canon RF-Mount
Format Size: Full-Frame (1.8x Crop)
Max FPS: 4K @ 60fps
This camera is very much the photography favorite from the new Sony mirrorless series, and it is great for all of the same reasons minus the price and the low light capability.
Wedding photographer and videographer? Here you are.
Price: $3,000
Mount: Sony E-Mount
Format Size: Full-Frame
Max FPS: 4K @ 30fps
Another wedding photography tool.
The Z7 is the big brother to the Z6, and it definitely is made for photographs with video tacked on. This is a very expensive 4K video camera in comparison.
Price: $3,546
Mount: Nikon Z-Mount
Format Size: Full-Frame
Max FPS: 4K @ 30fps
4
Blackmagic has made some of the best cameras available today. The pocket cinema camera 4K is a nice machine with a good price tag. You can get slow-motion in 4K, but there is an M43 (micro four thirds) crop from the sensor size.
Price: $1,300
Mount: Micro Four Thirds
Format Size: Micro Four Thirds
Max FPS: 4K @ 60fps
Really great camera for videographers and those looking for 4K footage with documentary and news implications. That isn’t to say this camera can’t be used for narrative filmmaking, but it probably wouldn’t be.
Price: $2,500
Mount: Micro Four Thirds
Format Size: Super 35mm
Max FPS: 4K @ 30fps
We finally dip into the cinema cameras for 4K. The FS5 is a great tool for narrative filmmaking, but be aware of Sony lens limitations. This camera does not do 4K slow motion.
Price: $4,748
Mount: Sony E-Mount
Format Size: Super 35mm
Max FPS: 4K @ 30fps
Canon cinema cameras with C-log get you some really fantastic footage, and you should always consider these cameras if you want to be a digital narrative filmmaker. This one does slow-motion 4K video as well.
Price: $6,000
Mount: EF/PL
Format Size: Super 35mm
Max FPS: 4K @ 60fps
Possibly the best camera on the list, and when you consider the dynamic range, lens compatibility, and slow-motion capabilities in 4K… why not? Remember that cinema cameras require extra accessories.
Price: $6,000
Mount: EF/PL
Format Size: Super 35mm
Max FPS: 4K @ 60fps
Panasonic brings a really great cinema camera with 4K slow-motion and some really great image quality. All of these cinema cameras will be amazing options, so just get the one that looks best to you.
Price: $7,345
Mount: EF/PL
Format Size: Super 35mm
Max FPS: 4K @ 60fps
Another great machine from Canon with even better specifications that the C200B. The extra $1500 gets you some picture quality for sure, which matters when you’re talking 4K. Could you get more from accessories?
Price: $7,500
Mount: EF/PL
Format Size: Super 35mm
Max FPS: 4K @ 60fps
The FS7 is a $4,300 jump from the little brother version, and the vast majority of that money goes toward the 4K picture quality.
Price: $9,000
Mount: Sony E-Mount
Format Size: Super 35mm
Max FPS: 4K @ 60fps
This RED Raven with Dragon sensor will allow you to record 4K at 120fps which means your footage can be slowed down to 4x speed while in 4K. Get ready to buy a hard drive as well to support the file size.
Price: $9,000
Mount: EF
Format Size: Super 35mm
Max FPS: 4K @ 120fps
This Canon tops off our list because it comes in right at $10,000. This camera is relatively brand new, so at least you won’t be upgrading too soon. The camera doesn't go higher than 30fps in 4K, but you can get 120fps at 2K.
Himath Ranhinda

By incorporating a variety of different camera moves into your shots, you can add a deeper sense of visual interest. Combine this with a strategic approach to messaging and you'll be off to the races. As with deciding how to frame your shots, take care when selecting the most appropriate camera move. The effect that each move has can vary significantly in how it makes the viewer feel.
Here are some well-loved camera moves to consider:
Probably the most well-known camera move, zooming gives the impression of moving closer or further away from the subject. It can be used effectively to magnify a certain focus point in the frame, but other moves such as a dolly, are a more natural way to show movement. While a quick zoom can help add a sense of drama and energy when used correctly, avoid over-using zoom as your default move.
Also if you're making a storyboard, Boords has pre-built indicators for Zooming (as well as a bunch of other common camera moves). Just click Insert Camera Movement in the Image Editor:
Panning is when the camera is moved horizontally from one side to another on a central axis. This is a rotating movement in which the camera’s position remains in place, but the direction that it faces changes. It can be used to follow a moving character or to fit more into a frame, for example, panning across a landscape to create a sense of place.
Making a storyboard? Show yourself some love and use our pre-built camera shot indicators.
Tilting is similar to panning in that the camera is kept in a stationary position, but unlike panning (which looks from side to side) tilting focuses on upwards & downwards movements. Using a tilting motion helps to fit more into a single frame. A slow upwards tilt can be very effective in making a subject appear bigger or more significant while a downwards tilt has the opposite effect.
A dolly shot is when the entire camera is mounted on a track and is moved towards or away from a subject. Unlike a zoom shot, the world around the subject moves with the camera. A dolly gives the illusion that the viewer is walking towards the subject and can be a great way of creating a sense of intimacy between them.
Similar to dollying, trucking involves moving the entire camera along a fixed point, but the motion goes from side to side, rather than in and out. It’s often used to follow characters in action. Mounting the camera on a fluid motion track will help to stamp out any jerking camera movements.
To add a truck indicator in Boords, just select Pan right from the Camera Movements menu in the Image Editor:
A pedestal (AKA Boom up/down or Jib up/down) involves moving the camera upwards or downwards in relation to a subject. It’s different from tilting in that the entire camera ascends or descends, rather than just the angle of the camera. A pedestal shot can be used to frame a tall or high subject (such as a building) while keeping the framing at eye level view for the viewer.
Super-fast online storyboarding with pre-built shot-type indicators. Seriously, you're going to love it. Scouts honour.
There are many ways to frame a subject within a shot, which can range from showing their entire body to fixating on a finer detail, such as their eyes. In choosing the most fitting shot, you’ll need to bear in mind the message that you’re trying to communicate to your audience.
Here are some of the most common types of shots and how you can go about using them:
Often included at the beginning of a scene, the establishing shot helps to build ambiance and may give a nod towards the context of what’s to come. It generally comes in the form of a long shot and indicates where (and sometimes when) the scene is taking place.
The full shot is just as the name implies and shows the entire body of the subject from head to toe. This shot tends to focus more on the character’s movement and gestures, rather than their state of mind.
Also known as the ¾ shot, the medium shot typically shows the subject from the knees up. It allows the viewer to see the background environment and the character’s gestures, while still being close enough to capture their emotions.
Get this guide as a poster
Download a copy of this guide as a free, printable PDF
...or embed on your site
Embed this image on your website
With a close shot, the subject’s head/face takes up the majority of the frame and therefore, allows their reactions and emotions to dictate the scene. The subject becomes the prominent focus and helps the audience build a personal connection, without being distracted by background interferences.
An extreme close shot is so close that only one specific detail, such as a person’s eyes or mouth, can be seen. Because of the unnaturally close nature of the shot, it should be used sparingly, but when used appropriately, an ECS can be incredibly effective at adding drama to a scene. It allows the viewer to see details that may have otherwise gone unnoticed and can really accentuate the emotions that the subject is experiencing.
An up shot is taken from below the eye-level of the subject and creates the perception that the viewer is looking at them from a lower perspective. This type of shot can give the impression that the subject is in some way powerful, heroic or even dangerous.
A down shot, in contrast to an up shot, is taken from above the eye-level of the subject and can make the subject seem vulnerable or powerless.
This type of shot is taken from behind the shoulder of another character and typically frames the subject in a medium or close shot. It is particularly effective in group conversation scenes and helps establish which characters are speaking to each other.
What's the best way to plan your film? With a storyboard of course. And it just so happens Boords is the best web-based storyboard software going.
A two shot presents two characters together within the same frame. It’s a natural means of introducing both people and can be used to shed light on their relationship with one another. Different variations of the two shot can be applied to deliver different messages about the characters. For example, when characters are positioned next to each other, it may give the impression that they have equal prominence within the scene.
The point of view shot, also known as the POV shot, depicts an angle that shows what a character is looking at. This type of shot allows the viewer to take on the perspective of the character and begin to understand their state of mind on a more personal level.
ARTICLE BY: HIMATH RANHINDA

So, you’ve got yourself a drone, expected great things, but what you end up with is what looks like home movies? Keep the following principles in mind, and soon enough you’ll have stunning, smooth and cinematic shots and be crowned a drone master.
Before you begin dabbling with flying drones and drone photography, be sure you’re certified. Flying a drone for commercial purposes can be done legally after becoming a certified drone pilot, thanks to the FAA Part 107 ruling in the Summer of 2016. Prior to this, a main concern of the FAA was with people flying drones near crowds, over highways, landing on oil barges and even near airports.
Take these factors into consideration and plan your shoot to be safe. Remember that these multi-rotor drones are essentially flying lawnmowers. Don’t fly over crowds, make sure everyone nearby is well aware of the dangers and keep non-essential personnel away from the shot. All it takes is one motor failure, a prop flying off or a guidance malfunction and you have a rogue blender flying around.
Don’t be afraid to cancel a shoot. The wind is not your friend. If it’s too windy out, delay the shoot. Even if your drone survives a high wind environment, your footage may not be what you wanted. Your priorities are to make sure everyone is safe, your equipment survives and you get great, stable, cinematic footage… right?
Finally, talk with the person in charge in great detail, whether it’s a director or client. Make sure you know what they have in mind. Speak up and don’t be afraid to address your concerns for safety issues. If you’re the director, ask yourself those questions. Review the shots using something like Google Earth to get an idea of the flight environment. Check out the area if possible and map out all the trees, electrical wires and obstacles. Then, go practice! Make sure you’re familiar with all your drone’s capabilities and limitations. Practice typical camera moves and get familiar with your drone’s smart shots—these can come in handy and even save you time.
To master drone photography and get those fantastic cinematic shots, you must use the appropriate equipment. You can’t shoot a large indoor shot with a giant drone, and you can’t expect good high-altitude footage with a mini drone, although a DJI Mavic is in sort of a sweet spot—it does both pretty well. When selecting your equipment, you should keep the following in mind:
The Drone: There are pros and cons to every drone. The Mavic Mini is great for indoor shots. It’s lightweight and has prop guards to prevent damage to both the drone itself and any property it touches. The Mini can even come equipped with obstacle avoidance sensors to provide additional safety. However, the Mavic Mini lineup has a more limited range and does not hold up well in strong winds.
DJI Mavic Mini: Image Courtesy – DJI
The DJI Mavic Air lineup is a cut above the Minis. They are incredible drones for a great price and can get both great indoor and outdoor shots. The lineup has introduced many new features to drones both cinematic and safety features. One of the new safety features is DJI AirSense, which alerts the drone pilot of nearby manned aircraft.
The Mavic Air drones are very capable, but they are not very impressive to show up to production with, and are still rather small and could be at the mercy of very strong gusts of wind. Check out our review of the Mavic Air 2.
The Mavic Pro / Zoom is a step up from the Mavic Air lineup and provides a bit more stability and professionalism. A step up from the Mavic Pro lineup is a step into the professional tier of drones such as the Inspire series, which are bigger, faster and better than any of the previous models. Inspire has far superior filming capabilities including up to three operators: pilot, gimbal operator and focus puller. There are also interchangeable cameras and lenses, as well as much higher quality recording formats. A big multi-copter is amazing, but good luck in close quarters. Choose your drone wisely and if you are limited on how many drones you have, choose your shots to suit what you can work with. To see DJI’s current drone selection, check out their website.
For your drone photography to look cinematic, you need the right video camera on your drone. Most drones these days are well equipped with capable integrated video camera systems. In fact, the main features you should consider when selecting which drone to use should be the video capabilities of the drone. Anything less than an Inspire means you’re pretty much stuck with the integrated camera system and its capabilities or limitations.
Perhaps you need to film your subject from further away, well the Mavic Zoom series incorporates a telephoto zoom lens allowing you to capture shots from much further away. Zooming in also increases the epicness of the parallax effect—creating an even more cinematic feel. Newer models of the Mavic series and higher budget drones come equipped with powerful subject-tracking capabilities. This relieves some of the operational requirements from pilots which frees them up to focus on more of the cinematic aspects of their job.
Drones have come a long way in recent years, and one notable improvement has been to the gimbal systems. Nowadays, anything from a $450 Mini 2 all the way up to an Inspire can capture buttery smooth cinematic shots—in large part to the improvements in gimbal and stabilization technology. While some of the historical complications and concerns about choosing which video camera to use has been taken out of the equation, choosing the right drone—and therefore its incorporated camera system still remains an extremely important choice for your project(s).
For the best drone photography, be smooth and slow. These are the words that need to constantly be moving through your head. Big dramatic and fast moves can end up with unusable footage, possible crashes and a nauseating viewing experience. Stay smooth and slow. At first, plan for only 3-5 second shots. A long shot coming from high above a city down to a front door is something that will make even the best pilots nervous. Keep your camera moving, keep it slow and make only minor adjustments.
You have to stay very gentle on the sticks or your shot will be useless, no matter how good your gimbal is. Practice, practice, practice. In the days leading up to the shoot, spend some time going through some shot moves to make sure you aren’t rusty on the controls. Rehearsing some typical flight movements means you’ll be in command of your drone when the shot counts. By the time you get out to your shoot, you shouldn’t be standing around thinking “hmm, what shall we do?”
In cinematography, we call it handles. Your shot should start well before you think and end well after you think. Just like when shooting with a dolly, you don’t abruptly stop when you think your shot is done. You continue the move for a few more seconds. That’s exactly what you need to do with a drone. Any editor who has worked with drone photography footage will tell you that their biggest pet peeve is when they see the perfect drone shot and the pilot abruptly swerves away just before the editor wants to mark an out, only to leave the editor with no room to edit. It seems obvious, but it happens…a lot!
Drone photography and aerial footage both is and isn’t like a steadicam, dolly or jib. With all the traditional movement systems, there is something holding you in place… the ground! However, the same shooting techniques apply. Tiny movements, lots of practice and stay very, very stable and slow. There’s an even better reason to stay slow besides just good footage. If you get your drone moving in some direction, there is no ground to slow it down nor stop—at least not in a pleasant way. Once it’s moving, it is you who can make it stop, swerve, avoid obstacles, etc. Slow will keep your aircraft in one piece. Thankfully, most modern drones now incorporate sophisticated obstacle avoidance sensors that step in to keep the drone from crashing should the pilot have a lapse in concentration.
If possible, don’t shoot into the sun. In fact, don’t shoot in even remotely the same direction. Your props could cast shadows on your lens and do very strange things to your video. Also, dust on your lens from the ground on takeoff otherwise it will shine like stars if the sun hits it. So, clean your lens before every flight.
The fly-by is an essential shot to grab for practically every project. Good for a quick cutaway, transition or just another shot variety for a montage. Fly your drone over, through or to the side of the subject. While the drone is flying by, pan or tilt the camera to ensure your subject is framed properly to maintain the best composition. Don’t forget to leave good handles on the beginning and end of your shot for editing purposes.
The classic orbit shot, a once notoriously very difficult shot requiring constant micro-adjustments to speed, angle, altitude, and the camera gimbal is now obtainable as an autonomous “quick-shot” on many drone models. Still, you’ll be able to have the most control over your shot for dynamic situations if you manually pilot the drone. In theory, rotate around your subject of interest in a complete circle at the desired altitude. Sounds easy enough… right? Try your next orbit shot manually to become a more capable pilot.
For this shot, as the title implies, you’ll be following a moving subject. The timing involved can be tricky to execute. Plan the shot with all those involved and start off with slower follow shots to build up confidence. As with most of these shot ideas, many drones offer an autonomous option for this shot—and they do work surprisingly well.
This shot formerly known as a “super-dolly” has since been popularized and given a more modern term—Dronie. The dronie got its name from the popular photo taking technique consisting of a self-taken photo—The Selfie. The Dronie shot fixates on the individual, group of individuals, or any type of subject and then flies up and away from the subject to reveal the surroundings.
Although not the most difficult, these are the most dangerous. You must pilot your drone straight through a gap, or hole in an obstacle field. It’s rather easy to perform a fly-through shot with the right drone and some practice. A smaller drone with prop guards takes away much of the stress and any potential catastrophic ending. Keep it as slow as possible. Newton’s laws—an object in motion stays in motion—can be your enemy here.
An essential shot for ground-based applications is the pan. The same idea can be done using a drone, only now the pan takes place high in the air. This shot is great for an establishing shot and showing off the surroundings. The best part of this shot is how easy it is! Simply fly up to your desired altitude and then start slowly panning the camera around. Make sure to grab both left to right, and right to left shot options, as well as leave handles on either side of the pan for the most flexibility while editing.
For the Pedestal shot, think about how you would prepare for a high pan. The first step is to fly up to an altitude. Simply hit record on your way up and you now have a pedestal shot. Take the pedestal shot one step further and make use of the gimbal by adding a tilt during your shot in order to maintain your subject in the frame.
These days, drones and their autonomous capabilities have allowed even novice pilots to acquire what used to be extremely difficult drone photography shots to master. While many of these shots are now easily obtained through a drone’s plethora of automated quick-shots, it’s still a good idea to manually execute these shots as often as you can, and only rely on a drone’s autonomous capabilities when you really need it. This will help to make you an all-around better and safer pilot.
HEAD OFFICE
ANGARIKA DHARMARAPALA ROAD,NATIONAL MUSEUM , KANDY ,SRILANKA,EARTH
0713788263
we are in 24 hours